Mastering the Art of Tie Tying: Easy Techniques for Every Occasion
Are you tired of struggling with tie knots? Do you want to add a touch of sophistication to your outfit without the hassle? Look no further! In this comprehensive guide, we'll walk you through the easiest tie tying techniques to help you master the art of tie tying in no time. **Why Learn Easy Tie Tying Techniques?** Tie tying may seem intimidating, but it's actually a skill that can be learned with practice and patience. Not only will you save time getting ready in the morning, but you'll also exude confidence and style with a perfectly tied tie. Whether you're a fashion novice or a seasoned pro, our easy tie tying techniques will help you tie your tie like a pro in minutes. **Step-by-Step Guide to Easy Tie Tying Techniques** Here are the simplest tie tying techniques to get you started:- Windsor Knot:** The Windsor knot is a classic and elegant tie knot that's perfect for formal events. To tie a Windsor knot, follow these steps:
- Begin by facing a mirror and standing up straight.
- Place the tie around your neck with the wide end on your left side and the narrow end on your right side.
- Cross the wide end over the narrow end, so that it forms an "X" shape.
- Take the wide end and pass it behind the narrow end.
- Bring the wide end up and through the loop you just created.
- Pass the wide end behind the narrow end again.
- Pull the wide end gently to tighten the knot.
- Four-in-Hand Knot:** The Four-in-Hand knot is a simple and versatile tie knot that's perfect for everyday wear. To tie a Four-in-Hand knot, follow these steps:
- Begin by facing a mirror and standing up straight.
- Place the tie around your neck with the wide end on your left side and the narrow end on your right side.
- Take the wide end and pass it behind the narrow end.
- Bring the wide end up and through the loop you just created.
- Pass the wide end behind the narrow end again.
- Pull the wide end gently to tighten the knot.
- Eldredge Knot:** The Eldredge knot is a stylish and asymmetrical tie knot that's perfect for adding a touch of personality to your outfit. To tie an Eldredge knot, follow these steps:
- Begin by facing a mirror and standing up straight.
- Place the tie around your neck with the wide end on your left side and the narrow end on your right side.
- Take the wide end and pass it behind the narrow end.
- Bring the wide end up and through the loop you just created.
- Pass the wide end behind the narrow end again.
- Pull the wide end gently to tighten the knot, then adjust the tie to create an asymmetrical shape.
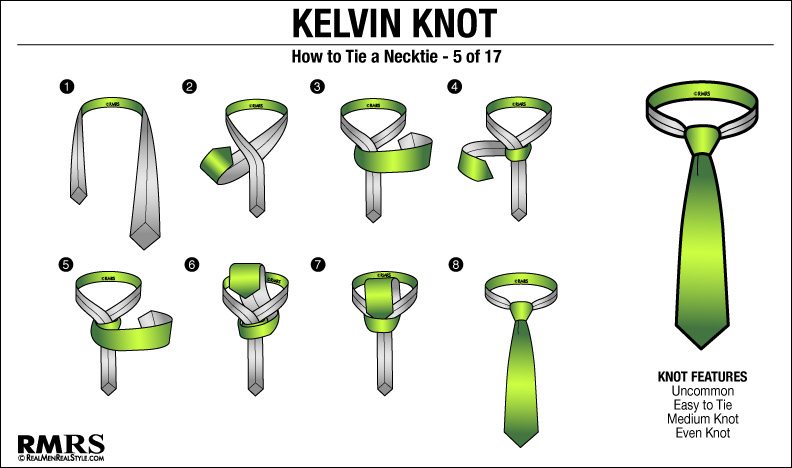
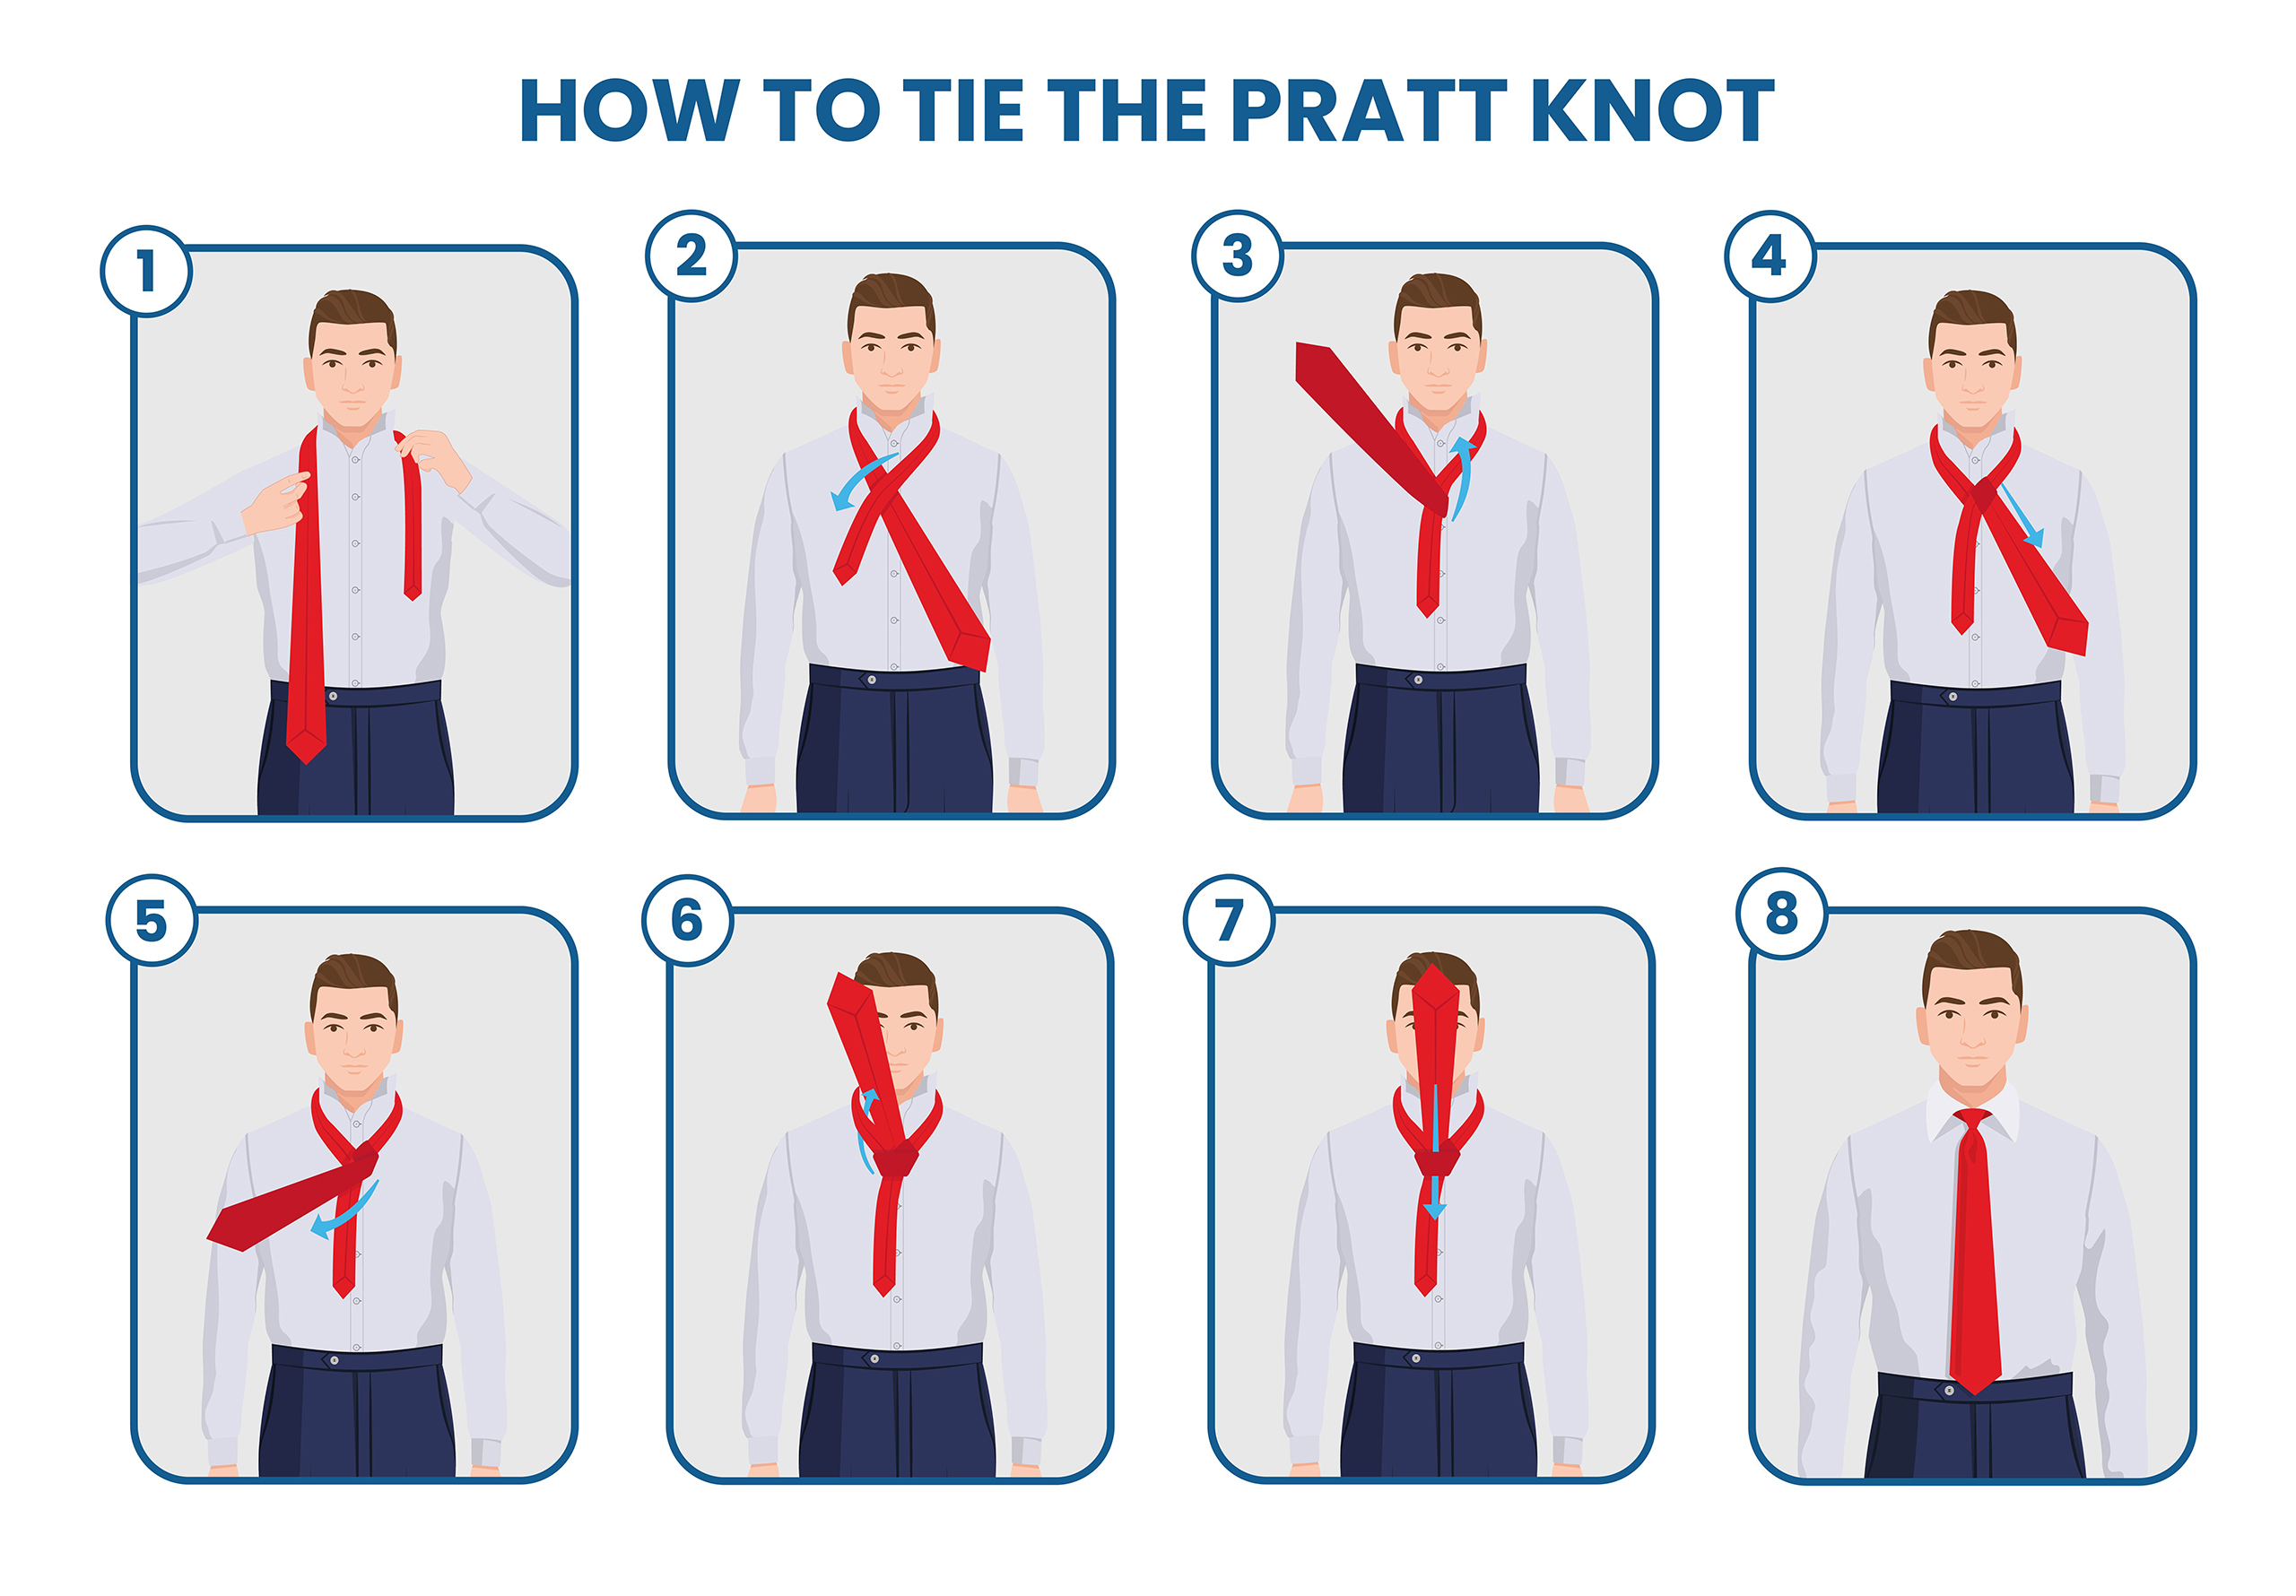
Furthermore, visual representations like the one above help us fully grasp the concept of Easy Tie Tying Techniques.
**Tips and Tricks for Mastering Easy Tie Tying Techniques** Here are some additional tips and tricks to help you master easy tie tying techniques: * Practice, practice, practice! The more you practice, the more comfortable you'll become with tying your tie. * Use a mirror to help you see what you're doing. * Start with a simple knot and gradually move on to more complex knots. * Experiment with different tie knots to find the one that works best for you. * Don't be afraid to make mistakes – it's all part of the learning process! **Conclusion** Mastering the art of tie tying takes time and practice, but with our easy tie tying techniques, you'll be tying your tie like a pro in no time. Whether you're a fashion novice or a seasoned pro, our step-by-step guide will help you learn the simplest tie tying techniques to add a touch of sophistication to your outfit. So why wait? Start practicing today and become a tie tying master in minutes! | Nicky Knot Step-by-Step Tutorial")


